


A function called screen mirroring iphone to macbook has gained popularity and enables users to mirror the display of their iPhone onto other gadgets like a MacBook. This article provides knowledge of iPhone screen mirroring, explains the idea, and emphasizes the advantages of doing so when reflecting an iPhone to a MacBook.
Understanding the Screen Mirroring Concept
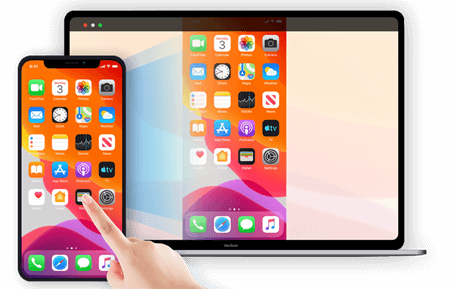
Displaying the contents of one device’s screen on another is called screen mirroring, also known as screen sharing or screen casting. Mirroring an iPhone screen to a MacBook entails mapping the iPhone’s display to the laptop’s. This allows users to see and interact with the applications, media, and other material on their iPhones on a bigger screen.
Screen mirroring connects the iPhone and the MacBook via wired or wireless connections like Airplay. It offers a practical method to share presentations, watch films, play games, and carry out numerous chores with a larger perspective by enabling a smooth, real-time transmission of the iPhone’s screen.
Advantages of Screen Mirror iPhone to MacBook
For consumers, screen mirroring from an iPhone to a MacBook has several advantages and benefits. Here are some significant advantages to think about:
Improved Viewing Experience: The iPhone’s screen may be mirrored to a MacBook for a more expansive and immersive viewing experience. The MacBook’s bigger display provides a sharper and more detailed visual experience, whether viewing movies, looking at images, or playing games.
Presentation and Collaboration: Professionals who often make presentations or work on projects with others may find screen mirroring helpful. They may effortlessly share material, present presentations, and interact with coworkers or customers on a larger screen by mirroring their iPhone’s screen to a MacBook, improving communication and efficiency.
Mirroring the screen of an iPhone to a MacBook might be useful for those who like gaming and leisure. It creates new opportunities for playing mobile games on a bigger screen, enhancing the immersion and enjoyment of the gameplay. A more cinematic experience may be had by streaming films, movies, or TV programs from the iPhone to the MacBook.
1.2.4 Productivity and Multitasking: By mirroring the iPhone screen to a MacBook, users may use the laptop’s multitasking features to increase productivity. They may access other Mac programs while concurrently using the apps on their iPhones, enabling seamless multitasking and improved productivity.
1.2.5 Sharing Material and Media: By enabling screen mirroring, you may share material and media with more people. Users may quickly share their material with friends, family, or coworkers by mirroring the iPhone’s screen to a MacBook, whether presenting slideshows, exhibiting films, or sharing family photographs.
1.2.6 App Development and Testing: Screen mirroring offers a practical means of testing and troubleshooting programs for programmers. Developers may carefully evaluate their app’s performance on a bigger monitor and spot any problems or improvements by mirroring the iPhone’s screen to a MacBook.
The introduction to iPhone screen mirroring summarizes the idea and advantages of projecting the iPhone’s screen onto a MacBook. Users may use an improved viewing experience, enable presentations and teamwork, participate in gaming and entertainment, increase productivity and multitasking, exchange material and video, and support app development and testing. With these benefits in mind, the next chapters will explore numerous strategies and tactics to effectively mirror an iPhone to a MacBook, giving readers a comprehensive manual for gaining access to this useful feature.
2: Mirroring an iPhone to a MacBook using AirPlay
You can wirelessly stream music, video, and images from your iPhone to your MacBook using AirPlay. To utilize your iPhone’s screen on your MacBook, use AirPlay to mirror it. This is helpful for presentations, viewing films, and playing games.
Installing AirPlay on a MacBook
You must ensure that your MacBook and iPhone are connected to the same Wi-Fi network to configure AirPlay on your MacBook. Then do these actions:
The MacBook’s System Preferences window.
Select “Sharing” from the sidebar.
Make sure “AirPlay Receiver” is selected and switched on.
You may choose “Anyone on the same network” or “Everyone” to enable others to AirPlay on your MacBook.
2.2 Using AirPlay to Link an iPhone to a MacBook
The procedures listed below may be used to connect your iPhone to your MacBook after setting up AirPlay on your computer:
Open Control Center on your iPhone.
On the AirPlay icon, tap.
From the list of available devices, choose your MacBook.
Enter the AirPlay passcode on your iPhone if it displays on your MacBook.
You may mirror your iPhone’s screen after it is linked to your MacBook through AirPlay by selecting the “Screen Mirroring” option. Streaming music, video, and photographs from your iPhone to your MacBook is also possible via AirPlay.
When utilizing AirPlay, bear the following in mind:
Your iPhone and MacBook must be connected to the same Wi-Fi network to use AirPlay.
The strength of your Wi-Fi signal will determine how well the AirPlay broadcast performs.
A few applications may not support AirPlay.
Remember that AirPlay may drain your iPhone’s battery quickly, so keep it charged.
Overall, sharing entertainment from your iPhone to your MacBook is a breeze using AirPlay. It may be a terrific way to view films, play games, or make presentations, and it is simple to set up and use.
3: Using QuickTime Player to mirror an iPhone to a MacBook
All Mac computers have installed QuickTime Player, a free media player. This tool may play, edit, and record Video and audio files. You may show the iPhone or iPad’s screen on your Mac by using QuickTime Player’s screen mirroring feature.
You’ll need the following to use QuickTime Player to mirror your iPhone to your MacBook:
using a Mac with macOS 10.9 or later
iOS 8 or later on an iPhone or iPad
a USB to Lightning cable
Installing and setting up QuickTime Player on a MacBook, section 3.1
You can get QuickTime Player free from the App Store if you still need to set it up on your Mac. Open QuickTime Player after installation and do the following configuration steps:
Choose “Preferences” from the “File” menu by clicking on it.
Click the “General” tab in the Preferences box.
Check the box next to “Show mirroring menu in menu bar” under the “Devices” section.
For the Preferences window to close, click the “OK” button.
3.2 QuickTime Player Step-by-Step Instructions for Mirroring the iPhone Screen
After setting up QuickTime Player, follow these instructions to mirror the display of your iPhone on your MacBook:
Utilize a Lightning USB cord to link your iPhone or iPad to your Mac.
If an iPhone or iPad popup to “Trust this Computer” displays, choose “Trust.”
Open QuickTime Player on your Mac.
In the “File” menu, choose “New Movie Recording.”
Click the arrow next to the “Record” button in the New Movie Recording box.
Choose your iPhone or iPad from the list of available devices.
To begin mirroring your iPhone or iPad screen to your Mac, click the “Record” button.
The “Stop” button in QuickTime Player must be clicked to end the screen mirroring on your iPhone or iPad.
Tips for Using QuickTime Player to Mirror the iPhone Screen to a MacBook
Try the following if you’re having trouble mirroring your iPhone or iPad screen to your Mac:
Verify that the newest software is installed on all of your hardware.
Change your USB cord.
Try rebooting your gadgets.
Ask for assistance from Apple Support.
To do the following tasks, you may use QuickTime Player to screen-mirror your iPhone or iPad to your Mac:
Make a presentation.
Display your images and videos.
game playing
Movies to watch
Use programs that are not Mac-compatible.
You may also record the screen of your iPhone or iPad using QuickTime Player. This may be used to record games, provide instruction, or collect other material.
4. Screen Mirroring using Third-Party Apps
The ability to reflect your iPhone or iPad’s screen on a bigger screen, such as a TV or computer monitor, is known as screen mirroring. This may be helpful while delivering presentations, playing video games, or viewing movies.
You may mirror the display of your iPhone or iPad using a variety of third-party applications. Among the most common choices are:
Mirroring AirBeamTV
ApowerMirror
Reflector
LonelyScreen
AirServer
All of these applications operate similarly. Once an app has been loaded, you must use a USB connection or Wi-Fi to link your iPhone or iPad to your computer or TV. Your iPhone or iPad’s screen will appear on the bigger screen once your devices are linked.
Many of these programs provide additional functionality in mirroring your screen, such as the capacity to record your screen, take screenshots, and annotate your screen.
4.1 Investigating Well-Known Third-Party Apps for iPhone Screen Mirroring
Some of the most well-liked third-party iPhone screen mirroring applications are listed below:
Mirroring AirBeamTV
One of the most well-liked third-party iPhone screen mirroring applications is AirBeamTV Mirroring. It works with many gadgets, including iPhones, iPads, and iPod Touches. Some screen mirroring functions, including the capacity to record your screen, take screenshots, and annotate your screen, are also supported by AirBeamTV Mirroring.
ApowerMirror
Another well-known third-party software for iPhone screen mirroring is ApowerMirror. It works with many gadgets, including iPhones, iPads, and iPod Touches. Other screens mirroring functions supported by ApowerMirror include the capacity to record your screen, take snapshots, and annotate your screen.
Reflector
A third-party iPhone screen mirroring program, Reflector, is made for corporations and educational institutions. It works with many gadgets, including iPhones, iPads, and iPod Touches. Other screen mirroring functions supported by Reflector include the capacity to record your screen, take snapshots, and annotate your screen.
LonelyScreen
A third-party screen mirroring software for the iPhone called LonelyScreen is made for gamers. It works with many gadgets, including iPhones, iPads, and iPod Touches. Other screens mirroring functions supported by LonelyScreen include the capacity to record your screen, take screenshots, and annotate your screen.
AirServer
Users who wish to mirror their screen to other devices, including TVs, projectors, and computers, may utilize the third-party iPhone screen mirroring software AirServer. It works with many gadgets, including iPhones, iPads, and iPod Touches. Several screen mirroring functions are also supported by AirServer, including the capacity to record your screen, take screenshots, and annotate your screen.
Installing and setting up third-party apps on a MacBook, section 4.2
You must do the following actions to install a third-party program on your MacBook:
Start the App Store program.
Find the software you want to install by searching.
Select “Get” from the menu.
The password and Apple ID you use.
Select Install from the menu.
After the application has been installed, you must configure it. Depending on the app, the setup procedure will change. Most applications, however, demand that you use a USB connection or Wi-Fi to link your iPhone or iPad to your MacBook. You can view the screen of your iPhone or iPad on your MacBook once your devices are linked.
Here are some extra pointers regarding screen mirroring with third-party apps:
Verify that the newest software is installed on all of your hardware.
Use a Wi-Fi connection or a high-quality USB cord.
Before you begin mirroring, close any extra applications.
Try rebooting your devices if you’re experiencing issues.
With screen mirroring, enjoying the material on your iPhone or iPad on a bigger screen is easy. You may effortlessly mirror your screen to some devices using third-party applications.
Wireless iPhone to MacBook mirroring
You may wirelessly exchange material, play games, and view films on a bigger screen by mirroring your iPhone to your MacBook. Additionally, you may utilize it to present or work on projects with others.
You will need the following to mirror your iPhone to your MacBook wirelessly:
MacOS Sierra or later on a MacBook
iOS 9 or later on an iPhone
Both of the devices used the same Wi-Fi network.
When you have everything you need, follow these instructions to mirror your iPhone to your MacBook:
Swipe down from the top right corner of your iPhone’s screen to see the Control Center.
Toggle Screen Mirroring on or off.
The devices that are accessible will be listed. From the list, choose your MacBook.
Enter the passcode that displays on your MacBook if asked.
The screen of your iPhone will now appear on your MacBook.
Open the Control Center on your iPhone and hit the Screen Mirroring icon again to stop the mirroring. Select Disconnect after that.
Setting Up Your Wi-Fi for Wireless Screen Mirroring
Before wirelessly mirroring your iPhone to your MacBook, log both devices into the same Wi-Fi network. To do this, take the following actions:
Open the System Preferences application on your MacBook.
On the Network icon, click.
Choose the Wi-Fi network you wish to use to establish a connection.
After entering the Wi-Fi network password, click the Join option.
Follow the previous instructions to mirror your iPhone to your MacBook after connecting to the Wi-Fi network.
Setting Up a Wireless Connection Between an iPhone and a MacBook
Following these steps will allow you to link your iPhone and MacBook after you have confirmed that they are both connected to the same Wi-Fi network:
Swipe down from the top right corner of your iPhone’s screen to see the Control Center.
Toggle Screen Mirroring on or off.
The devices that are accessible will be listed. From the list, choose your MacBook.
Enter the passcode that displays on your MacBook if asked.
The screen of your iPhone will now appear on your MacBook.
Open the Control Center on your iPhone and hit the Screen Mirroring icon again to stop the mirroring. Select Disconnect after that.
Here are some more pointers for wirelessly mirroring your iPhone to your MacBook:
Verify that the most recent software is installed on both devices.
Minimize the space between your MacBook and iPhone.
Do not use other devices on the same Wi-Fi network as your MacBook and iPhone.
Try rebooting your MacBook and iPhone if you have difficulties connecting them.
You may wirelessly exchange material, play games, and view films on a bigger screen by mirroring your iPhone to your MacBook. You can quickly connect your two devices and begin taking advantage of wireless screen mirroring’s many advantages by following a few easy steps.
Mirroring your iPhone to your MacBook via a Lightning to USB cord.
6.1 Using a Lightning to USB cable, attach an iPhone to a MacBook
You will need the following to use a Lightning to USB connection to connect your iPhone to your MacBook:
a USB to Lightning cable
The MacBook
Once you have all of your resources, proceed as follows:
Your iPhone should be connected to the cable’s Lightning end.
Your MacBook should be connected to the USB end of the cord.
If asked, choose “Trust This Computer” on your iPhone.
Open the “System Preferences” application on your MacBook.
Select “Displays” from the menu.
Select the “Mirroring” checkbox under the “Displays” tab.
From the list of possible screens, choose your iPhone.
Select “Apply” from the menu.
Now your MacBook display ought to be reflected on your iPhone display.
Setting Up Screen Mirroring for Success, Section 6.2
You may change a few settings to ensure your iPhone screen is effectively mirrored on your MacBook screen.
Check the brightness of your iPhone and MacBook displays to ensure they are comparable. This will lessen the likelihood of eye strain.
Orientation: You may adjust the screen of your MacBook to make it parallel to the orientation of your iPhone. This will enable you to see your iPhone’s screen on bigger displays more easily.
Sound: You can play the sound from your iPhone via the speakers on your iPhone or the speakers on your MacBook. Open the “System Preferences” application on your MacBook and choose the “Sound” icon to accomplish this. Choose the speaker you wish to use under the “Output” option.
After making these adjustments, you should be able to mirror your iPhone screen to your MacBook screen effectively.
Here is some more screen-mirroring advice:
You may need a different cable if your iPhone or MacBook needs to be updated. Apple advises utilizing a Lightning to VGA or Lightning to Digital AV adapter.
Check that your iPhone and MacBook are powered on and running the most recent versions of their respective operating systems if you are experiencing problems connecting the two.
You may ask for assistance from Apple Support if you are still experiencing problems connecting your iPhone to your MacBook.
7: Resolving Common Problems
Solutions for Connectivity Issues
Connectivity problems are frequent difficulties faced while mirroring an iPhone to a MacBook. When the devices cannot create a strong connection, it might not be very pleasant. To fix these issues, try several troubleshooting techniques.
Ensure your MacBook and iPhone are first linked to the same Wi-Fi network. They won’t be able to interact with one another for screen mirroring if they are on separate networks. Examine both devices’ Wi-Fi settings and join them to the same network.
Ensure the Lightning to USB cord is firmly inserted into both the iPhone and the MacBook if you’re using a wired connection. If the connection is still problematic, try a new cable or port. Defective parts or connections may sometimes bring on connectivity problems.
Verify that AirPlay is turned on in your MacBook if you want to use it for screen mirroring. Make sure the box next to “Show mirroring options in the menu bar when available” is ticked in System Preferences, Displays, and System Preferences. You will be able to access AirPlay settings from the menu bar quickly.
Restart both your iPhone and MacBook if you’re still having connection issues. A simple reboot may fix momentary issues and reestablish the device connection. Both devices should be turned off and given a brief window before being turned back on.
You may need to troubleshoot your Wi-Fi router if none of the procedures above are successful. Unplug your router from the power source, wait a few seconds, and then connect it back to restart. Doing so lets you update the router’s settings and fix any connection problems.
7.2 Fixing Audio and Video Synchronization Problems
Audio and video synchronization issues are another frequent concern when mirroring an iPhone to a MacBook. You can experience a delay between the audio and visual playback when viewing films or playing games.
First, ensure that your iPhone and MacBook software is updated to the most recent versions. Updates to software often offer performance enhancements and bug fixes that help remedy such problems.
Make the necessary changes to the QuickTime Player settings to synchronize the audio and video while screen mirroring. Open QuickTime Player on your MacBook, choose “Show AV Controls” from the “Window” menu, then pick the “Settings” button from the AV Controls panel. You may manually add or remove milliseconds to change the audio sync.
Try lowering the video quality on your iPhone if you are having trouble with audio and video synchronization while using AirPlay. Higher video resolutions need more processing power and might result in a delay in the audio and visual synchronization. Try reducing the iPhone’s video quality settings to see if the sync problem improves.
7.3 Addressing Additional Technical Issues
You could encounter additional technical difficulties when mirroring your iPhone to a MacBook than connection and sync problems. Here are some more methods for troubleshooting to assist you in getting beyond these challenges:
Ensure your programs, such as video players or third-party apps, are updated before utilizing them for screen mirroring. Developers often release updates to fix issues and increase compatibility.
Make sure your iPhone and MacBook are compatible with the screen mirroring technique you’re using by doing a compatibility check. Some mirroring functions may not work with older iPhone models or MacBook versions. For compatibility details, see the user manuals or the device specifications.
Remove temporary files and cache: Temporary files and cache may build up over time on both your iPhone and MacBook, impacting speed. Regularly deleting these files will help your devices run more smoothly during screen mirroring.
Conclusion
In this extensive article, We have covered all available ways to mirror an iPhone to a MacBook. From utilizing built-in capabilities like AirPlay to using third-party programs and hardware connectors, we have covered a wide variety of subjects. You can effortlessly mirror your iPhone’s screen onto your MacBook and get a fluid viewing experience by following the instructions and helpful hints in previous chapters.
Throughout the book, we have stressed the value of a steady internet connection, current software, and device compatibility. These elements are essential to proper screen mirroring and preventing possible problems.
Additionally, we spoke about the advantages of mirroring your iPhone to a MacBook, including the capacity to play mobile games with improved graphics, see images and videos on a bigger screen, and share material during presentations. You can leverage the capabilities of your devices and improve your user experience by using screen mirroring.
Additionally, we discussed typical issues that could come up throughout the mirroring process and offered debugging methods. The advice and recommendations in previous chapters may be used to tackle connectivity difficulties, audio and visual sync issues, and other technical hurdles. You can get through any challenges by knowing these possible roadblocks and implementing the recommended answers.
It is important to remember that technology is continually changing, and new additions, functions, and applications can appear in the future. As a result, keeping up with the most recent innovations and improvements in screen mirroring techniques may improve your entire experience and guarantee that you are using the most recent approaches available.
Always put your privacy and security first while you explore the world of screen mirroring and the opportunities it presents. Ensure your devices are secured with reputable security measures, and use caution when providing rights or sharing private information via mirroring programs.
In conclusion, the ability to mirror your iPhone to a MacBook creates a world of new possibilities for ease, enjoyment, and productivity. The capacity to mirror your iPhone’s screen to your MacBook gives a staggering amount of adaptability, whether you’re looking to share material with others, enjoy entertainment on a bigger screen, or use both devices in tandem.
You may fully use screen mirroring and effortlessly combine your iPhone and MacBook by adhering to the instructions offered in this book and addressing any difficulties that may crop up. By embracing its power, please take advantage of a synchronized and linked digital environment.
Now that you have read this tutorial, you are prepared to start your screen mirroring adventure with the information and useful insights you have learned. Embrace screen mirroring’s flexibility and ease to unlock a new level of engagement and productivity between your iPhone and MacBook.
You may also like:
How to Connect AirPods to MacBook, Air or Pro


