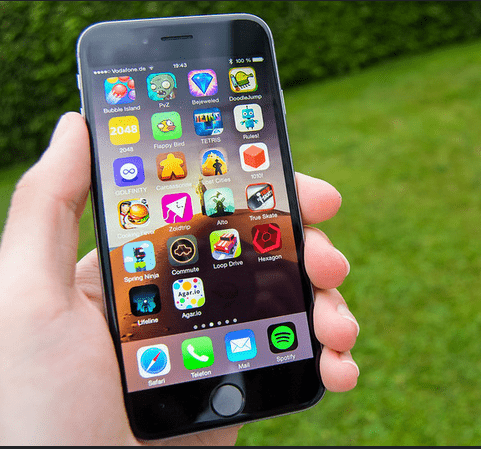
Taking a screenshot on the smartphone is pretty straightforward, but do you know how to take a screenshot on Windows laptop or MacBook? Take a Screenshot on a Windows Laptop
Is your PrtSc Key is not working?
Or do you want to take a screenshot of some specific part of the screen with some edits?
Whatever is the reason you will get your answers here.
The method to take a screenshot on a laptop is a little bit different than on a conventional desktop PC.

Table of Contents
For Windows Laptops
Taking a screenshot on Windows laptop is simple, you can take screenshots with the combination of keys. It is a little bit different from a MacBook.
If you have a MacBook, here you can see how to take screenshots on a MacBook.
Using Fn Key Combinations
If you have a laptop then you must know there is a ‘function’ button Fn, many functions are controlled by that button like increasing or decreasing the brightness or volume.
You can also take screenshots using that button. Press Fn + PrtSc, this take a screenshot of the entire current screen and will copy that on the clipboard.
Now you can use the editing apps like Paint to edit and save that screenshot. The screenshot will be saved in your desired location in your drive.Take a Screenshot on a Windows Laptop
Here are the other possible combinations of keys with ‘Fn’ you can use to take the screen.
For the screenshot of the full screen:
- Press the Windows logo key + Prtscn key +Fn, and it will take a screenshot of the entire screen and save it in Photos directly without using any tool. This method can be used to make a really quick screenshot.
For the screenshot of an active window:
- Press Prtscn key + Alt + Fn, this also takes a screenshot of the active window and save that on the clipboard, so you have to use an app like paint to edit and save it
Quick screenshot:
- Just press the Prtscn key, and it will take a quick screenshot and copy on the clipboard. This method works mostly on desktop computers, but it works like a charm on some laptops too, so do give it a shot.
Unique Method for Windows 10 Only
If you are a Windows 10 user, then all of the above methods will work for you to take a fast screenshot. But if you like to take a screenshot of some specific area on the screen, then press Windows logo key + shift +S, and then your screen will be dimmed, and you can select the part of the screen you want to take a screenshot of. Select the area and save it.
It will be saved in Photos. Take a Screenshot on a Windows Laptop
How to Take a Screenshot on Windows Tablet
Windows tablets come with a detachable keyboard, using the keyboard you can use the same methods as above, but if you have detached your keyboard, then you can take a screenshot using Windows logo + the volume down key.
Using Third-party apps
Most of the time we want to take a quick screenshot, and we love to do quick edits to it, but Windows paint app does not offer good editing of screenshots. So third party software is the solution here.
LightShot
This is the app I use on my laptop and desktop more often.
Using this app, you just have to press the Prtscn key, and it will dim the screen, then you can select the area of which you want to take a screenshot. Moreover, you don’t have to use another tool to edit that screenshot as Lightshot give you a lot of options right there, like editing, writing on the screenshot and adding arrows and shapes on the spot.
Then the screenshot will be saved in the Documents of your computer.
How to Take a Screenshot on MacBook?
It is also as simple as in Windows, but the key combinations are a little bit different. Here are some key combinations to take a screenshot on a MacBook.
Screenshot of Entire screen & Take a Screenshot on a Windows Laptop
Press Command ⌘ + shift +3 key.
This will make a sound and take a screenshot of the whole screen, and that will be saved with the name of the date on the desktop.
If you want to copy that screenshot on the clipboard, then press Command ⌘ + Shift +Ctrl + 3 key.
Using this key combination will take a screenshot of the entire screenshot of the whole screen and copy on the clipboard so that you can edit that in your favorite edit editing app.
Screenshot of the specific part of the screen.
Like Windows, Mac also allows taking a customized screenshot of a specific part of the screen.
Press Command ⌘ + Shift + 4 keys.
This will allow you to select the part of the screen you want to capture.
Select that using cursor and release, it will automatically take a screenshot and is saved.
Screenshot of Specific Windows
If you want to take a screenshot of the active window only or some specific Windows, then press
⌘ + shift + 4 + spacebar
Now using cursor select the Windows for a screenshot.
Done!
Conclusion
Taking a screenshot can be really important, you can use simple key combinations to take screenshots on your laptop. Take a Screenshot on a Windows Laptop
Here are some methods to take a screenshot on your laptop. You can use these methods on any OS, including Windows 10 and Windows 7.
If you are using Windows laptop, try these methods to take screenshots really quick.
And if you are a Macbook laptop user, then use these key combinations to take screenshots in the way you like.
Windows tablet users can also take a screenshot without having a keyboard.
I prefer the third party apps to take screenshots, but What is your favorite method to take a screenshot on laptop?
Do let us know in the comments.


![4 Ways to Hack a WiFi Password on Android in 2023 [No Root] TechSaaz - how to hack a wifi password on android](https://www.techsaaz.com/wp-content/uploads/2019/08/how-to-hack-wifi-on-android-100x70.jpg)


